This repair can be necessary is a hatch has been damaged, usually this happens when there has been an impact on rocks or with another kayak.
What you need
- Sikaflex 252 for gluing.
- Sika Primer 206 G+P.
- Gloves
- 80 grit sandpaper
- Acetone or another fast-evaporation solvent
- Furniture or car polish
- Utility knife
- Blunt chisel
Instructions
- Sand down the old Sikaflex. It's not necessary to remove it completely.
- Remove any dust or debris.
- Prime the new rim before fixing it.
- Place the old rim into the deck and apply some furniture or car polish around its sides. This makes it easier to remove any squeezed-out glue later. Ensure NO polish gets on the surface where the new rim will sit!
- Apply a bead of Sikaflex around the area where the rim will fit.
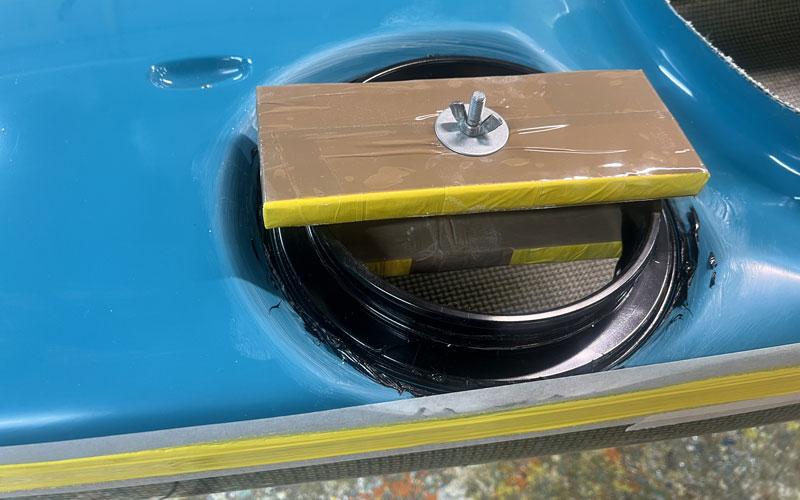
- Press the new rim into position and move it slightly to ensure it is properly bedded in. Avoid applying too much pressure, as this could squeeze out all the glue. (The method shown in the article photograph works very well here and can be achieved at home with 2 pieces of wood, 2 washers and a nut and bolt).
- To remove excess glue, you have two options:
- Wipe it off immediately using several cloths (this can be messy!), or
- Wait until it is dry (approximately 15 hours), then trim the inside with a Stanley knife and the outside with a blunt chisel. Use solvent to clean any remaining glue.
- Pat yourself on the back, you did it.


Kayak order form | Paddle enquiry form
Social media | Contact us | +44 (0) 1407 765550